This story is a part of one5c’s guide to sustainable fashion. Read more about fast fashion and the climate, sustainable laundry, clothing storage, and repairing.
For some shoppers, there’s nothing quite like the dopamine hit of a fresh find, but buying new duds isn’t the only way to feel that spark. Upcycling clothing, or transforming an old or unwanted garment into something new and valuable, is a great way to raise your fashion game while lowering the environmental impact of your wardrobe.
Upcycling is a means to push back on the wastefulness of fast fashion. By 2030, the world could be tossing some 148 million tons of textiles a year, representing a 60% jump since 2015.1 One way to turn that stream of castoffs around is to reimagine even stained or ripped clothes as novel additions to your closet.
Not only is upcycling a great way to reduce the amount of clothes you trash, but it can also help you cut down on how much you buy. Besides, adding a little flair—through projects like dyeing, altering, or embellishing—is a fun way to add creativity and personality to your wardrobe. It allows you to create something you can guarantee no one else will be wearing. Here are a few projects that you can get started on today with just a few tools and tricks.
What is upcycled clothing?
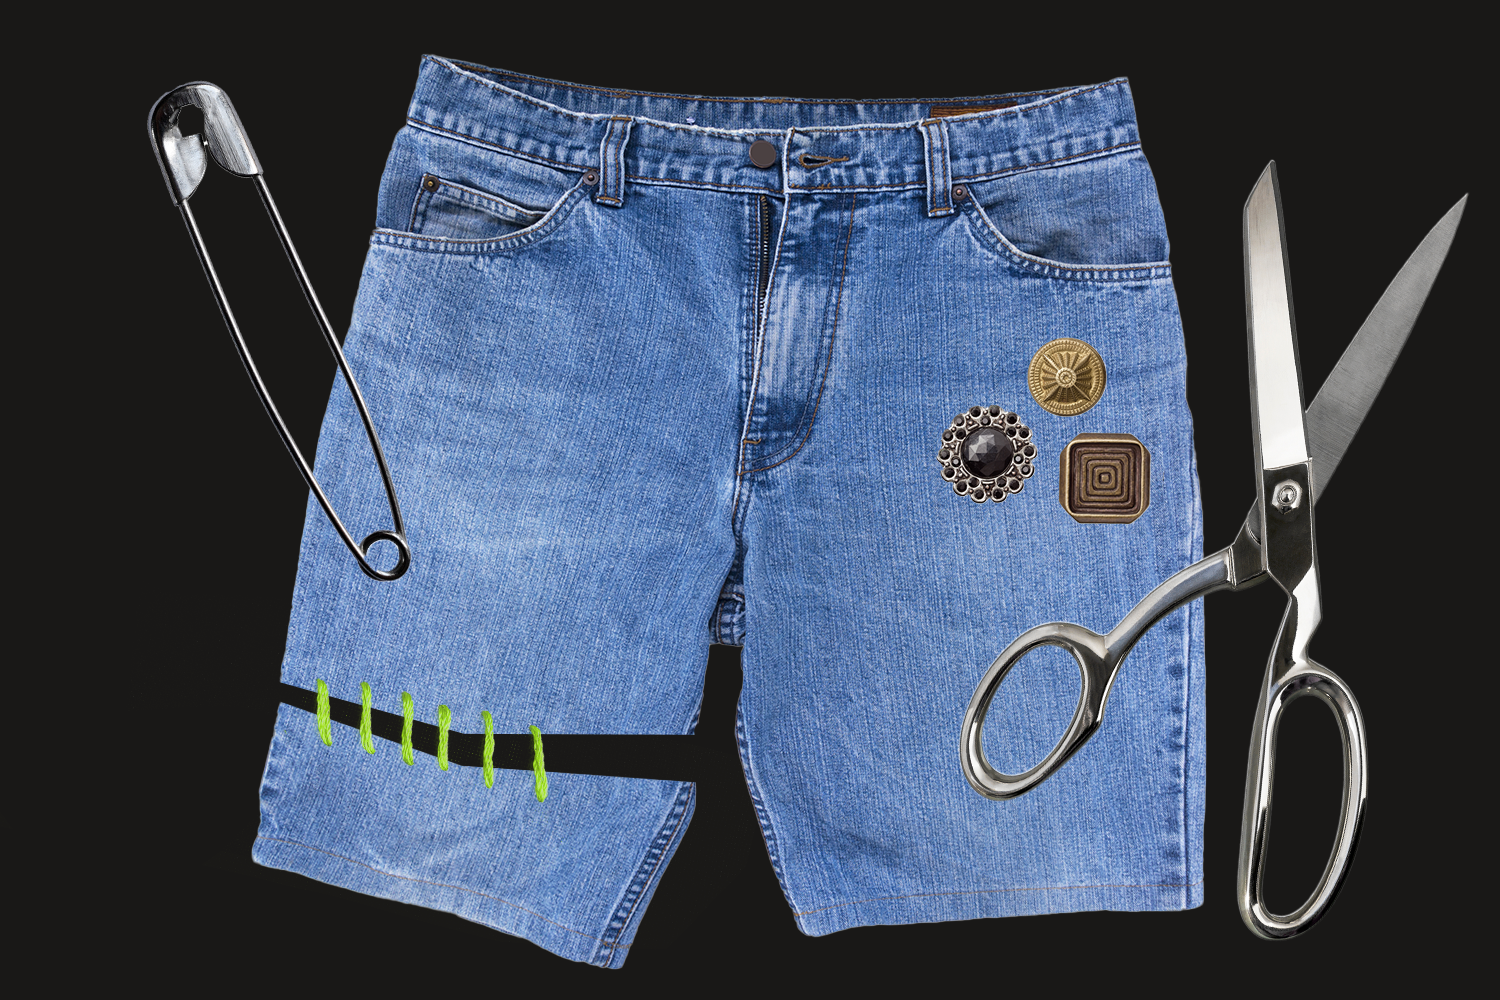
Upcycled clothing can take on many many forms. It can mean, for example, adding details like patches or embroidery to boring, unwanted clothes. Or it can mean slightly tweaking, trimming, or fully disassembling items to extend their life. If your gym T-shirts start to stink in the armpits, for example, just cut off the sleeves. If you want to crop a shirt, sew the hemline up higher by hand or with a machine. Old jeans can become jean shorts just as easily.
If some of the more advanced upcycling projects sound too difficult for you, you can choose to send your unwanted wares to small businesses that upcycle clothes. Some great examples include Re.statement, Zero Waste Daniel, Noorism, Psychic Outlaw, and Assemblage Studio & Co.
Essential tools and materials for upcycling
To start upcycling, first you’ll of course need fabric or garments to work with. Old pieces you don’t wear anymore are great candidates—or you can also ask friends and family for their extra pieces, too. Upcycling is also a fab way to revive garments you don’t wear but that have special meaning you want to preserve, like a commemorative T-shirt. Remember to save any scrap fabric from upcycling projects for future use. Who knows, they could make a perfect patch for your next design.
For basic upcycling, it will help to have:
- Scissors (fabric scissors are preferred)
- Needle and thread
- Straight pins
- Measuring tape
- Marking tool like a fabric pen or chalk wheel
- Fabric glue
- Embellishments like patches, buttons, lace, and zippers
For more advanced projects, you may also want:
- Non-toxic clothing dye
- Hem tape
- Seam ripper
- Sewing machine
Simple upcycling projects for beginners
Using just scissors
Fingerless gloves: When the bottom of your socks become thin, simply cut off the toes and add a slit for your thumb to poke through. Wool socks make for excellent winter gloves. For more, check out this tutorial.
Jean shorts: Line up a pair of shorts of your desired length with the jeans. Mark where they meet and cut along the line. You can stop there for a frayed edge, or roll them up for a cleaner look. For more, check out this tutorial.
Crop tops: Try on the shirt, and measure the length you want to chop for a cropped look. Mark your cut line with pins and cut along the line. To prevent the raw edges of the side seam from unraveling over time, add a straight or zigzag stitch around the hem with your sewing machine or a running stitch if you’re sewing by hand. For more, check out this tutorial.
Simple sewing
Patches: Patches can add intrigue to a jean jacket, cover holes in ripped jeans, reinforce the elbows on a button-down shirt, or cover up torn knees on pants. Some store-bought ones come with a heat-activated glue on the back which lets them affix with an iron. Otherwise, you can attach patches with fabric glue. But for the most durability, pin the patch in place and sew it on. For more, check out this tutorial.
Easy embellishments: Use fabric glue or a needle and thread to add beads, lace, zippers, pockets, and more to any garment. This could look like adding a color-blocked chest pocket to a shirt, lace to the hem of a dress, or beads to the back pockets of a pair of jeans Or, if you’re a ‘90s kid, bedazzling to your heart’s content. This technique is all about adding to what you already have to create a unique look. Come up with your own design, or visit upcycling blogs like Trash to Couteur or Upcycle My Stuff for inspiration. For more ideas, check out this tutorial.
Intermediate upcycling projects
Change the color
Change the color of a garment with non-toxic, natural fabric dye, which means hues that don’t contain potentially dangerous ingredients like heavy metals. Generally, dyeing a garment means mixing the dye with hot water, and submerging the clothing item for the recommended amount of time (the longer the richer the color), then rinsing until the water runs clear. Make sure you get the right type of dye for the fabric you’re using by referencing a guide like this one from Manhattan Wardrobe Supply. Or you can opt for homemade dyes made from plants or food scraps; for example, you can create a red or pink hue from beets and pomegranates or yellow from paprika or marigolds. Alternatively, you can try bleaching darker fabrics, or tie-dyeing for a multicolor look. For more on the basics of fabric dyeing, check out this tutorial.
Alter a neckline
Sure, you can easily transform a T-shirt into a range of rough-but-cool shapes with just a few snips. But, with some basic sewing skills, you can turn a T-shirt into a proper V-neck, widen a neckline, or create any other type of shape you want. For a simple neckline alteration, this will often mean removing the stitches connecting the collar to the shirt, cutting the fabric to your desired shape, and sewing the collar back on at the new neckline. More advanced techniques, like lifting a neckline, may require altering the shoulder seam as well.
Embroider
Woven fabrics that aren’t too stretchy or thin, like denim or linen, are ideal canvases for embroidered designs. To add this kind of flourish, you’ll need an embroidery hoop, embroidery floss, needles (smaller is better), and a backing, which is an optional material you can place on your fabric when stitching for stability. You’ll also need a template for your design; often printed on paper, these serve as an outline or guide for accurately stitching a design on the fabric. Once you become more advanced, you can even freehand embroider directly on clothes, without the need for a template. Shorter, smaller stitches between 4 mm and 6 mm work best on clothing. Skip delicate stitches like the spider wheel rose (an embroidery stitch that creates a raised rose) and be wary of loop stitches (which creates a raised, loop-like structure), as they’re more likely to come undone in the laundry. For more, check out these tutorials.
Paint
If you’re skilled with a brush, or if you enjoy a Jackson Pollock-inspired splatter, you can add all kinds of painted embellishments to your clothes—like, say, to the back of a denim jacket. (Stencils can help if you’re not ready to freehand.) Acrylic paint, which can be found at most craft stores, works on many textiles when mixed with an additive called fabric medium. Setting designs in place requires a bit of heat, such as from an iron, on the opposite of the painted side once it has dried. When washing, turn the garment inside-out and use cold water and a gentle cycle. For more, check out this tutorial.
Advanced upcycling projects
If you’re keen on taking the next step, you can transform one piece of clothing (or even a scrap of fabric) into something else entirely. Use a seam ripper to break down clothes into their component parts, then use a pattern—many are free online—and a sewing machine to create a unique piece. Some examples: Turning an old blanket into a tote bag, creating a color block sweatshirt by combining two different items, converting a dress into a matching shirt and skirt set, and even transforming a bedsheet into a dress.
If you’re at this stage, you might also be hungry for some more formal instruction. The Internet is full of blogs and YouTube videos that can guide you in self-education, but also formal courses. Some paid options include Sew It Academy, The Tailor Academy, and Closet Core Patterns. You can opt for one-off courses in areas you’re interested in but need some help with, or follow full curriculums with a membership. Alternatively, check with professional sewers in your area about whether they offer group or individual classes.
Footnotes
- Death by Waste: Fashion and Textile Circular Economy Case, Science of the Total Environment, May 2020Return to content at reference 1↩